April, 2011
Yaesu FTM-350AR
I found that when I went to configure all of the settings for APRS in the FTM-350AR that the manual was very sketchy, and there were limited resources on the internet. Below I have compiled all of my settings (hopefully I did not miss any!) along with a picture(s) for each step. Please note that all of the steps are based upon using the internal FGPS-1 unit. If you are using an external GPS antenna such as a Byonics, you may have to piece things together a little differently. Feel free to send me an email (kd8ksn (at) amsat.org) if you have questions.
Before you begin, set your VFO/MEM to 144.390MHz, then select the "SET" button on the bottom left of the main VFO screen, then select the "APRS/PKT" menu list.
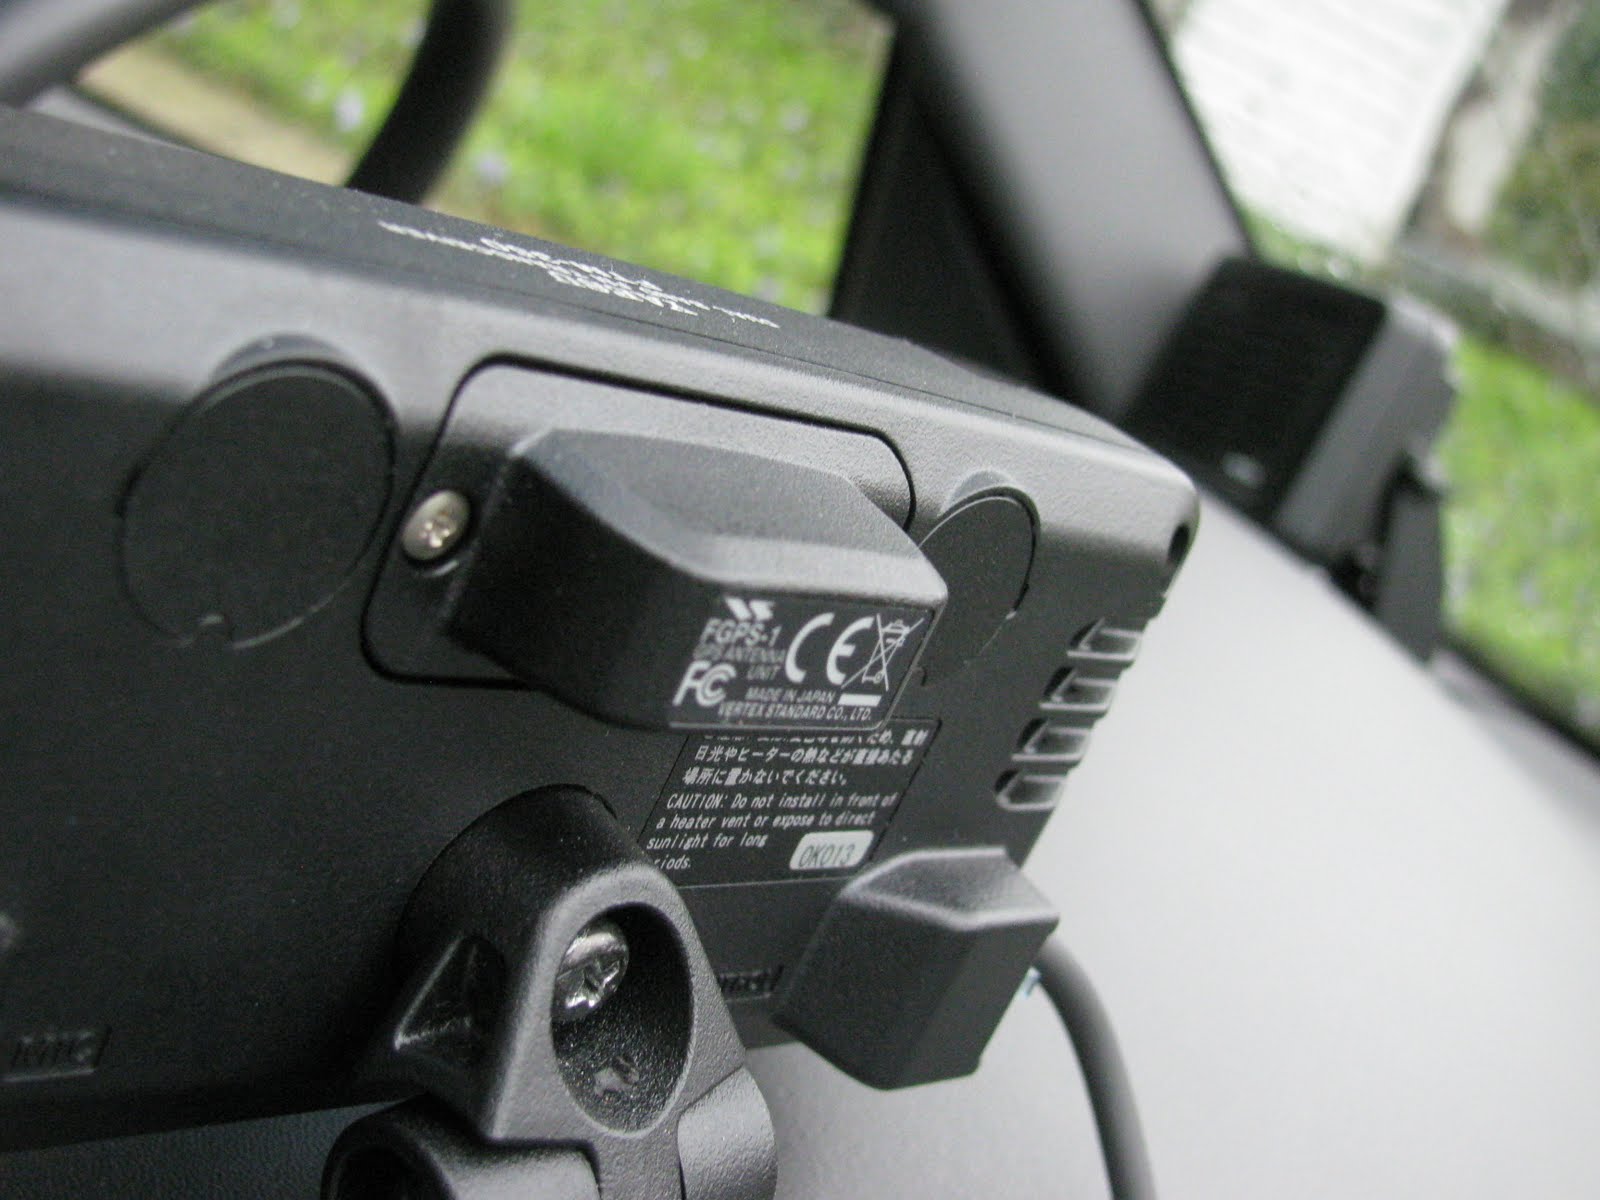
#1
Install the FGPS-1 unit on the rear of the FTM-350AR. A phillips screwdriver will be needed to remove the cover and install the module. Installation time is 2 minutes.
#2: E29
Enter your callsign followed by -9 (for a mobile station) using the keypad on the DTMF mic or via the main tuning dials.
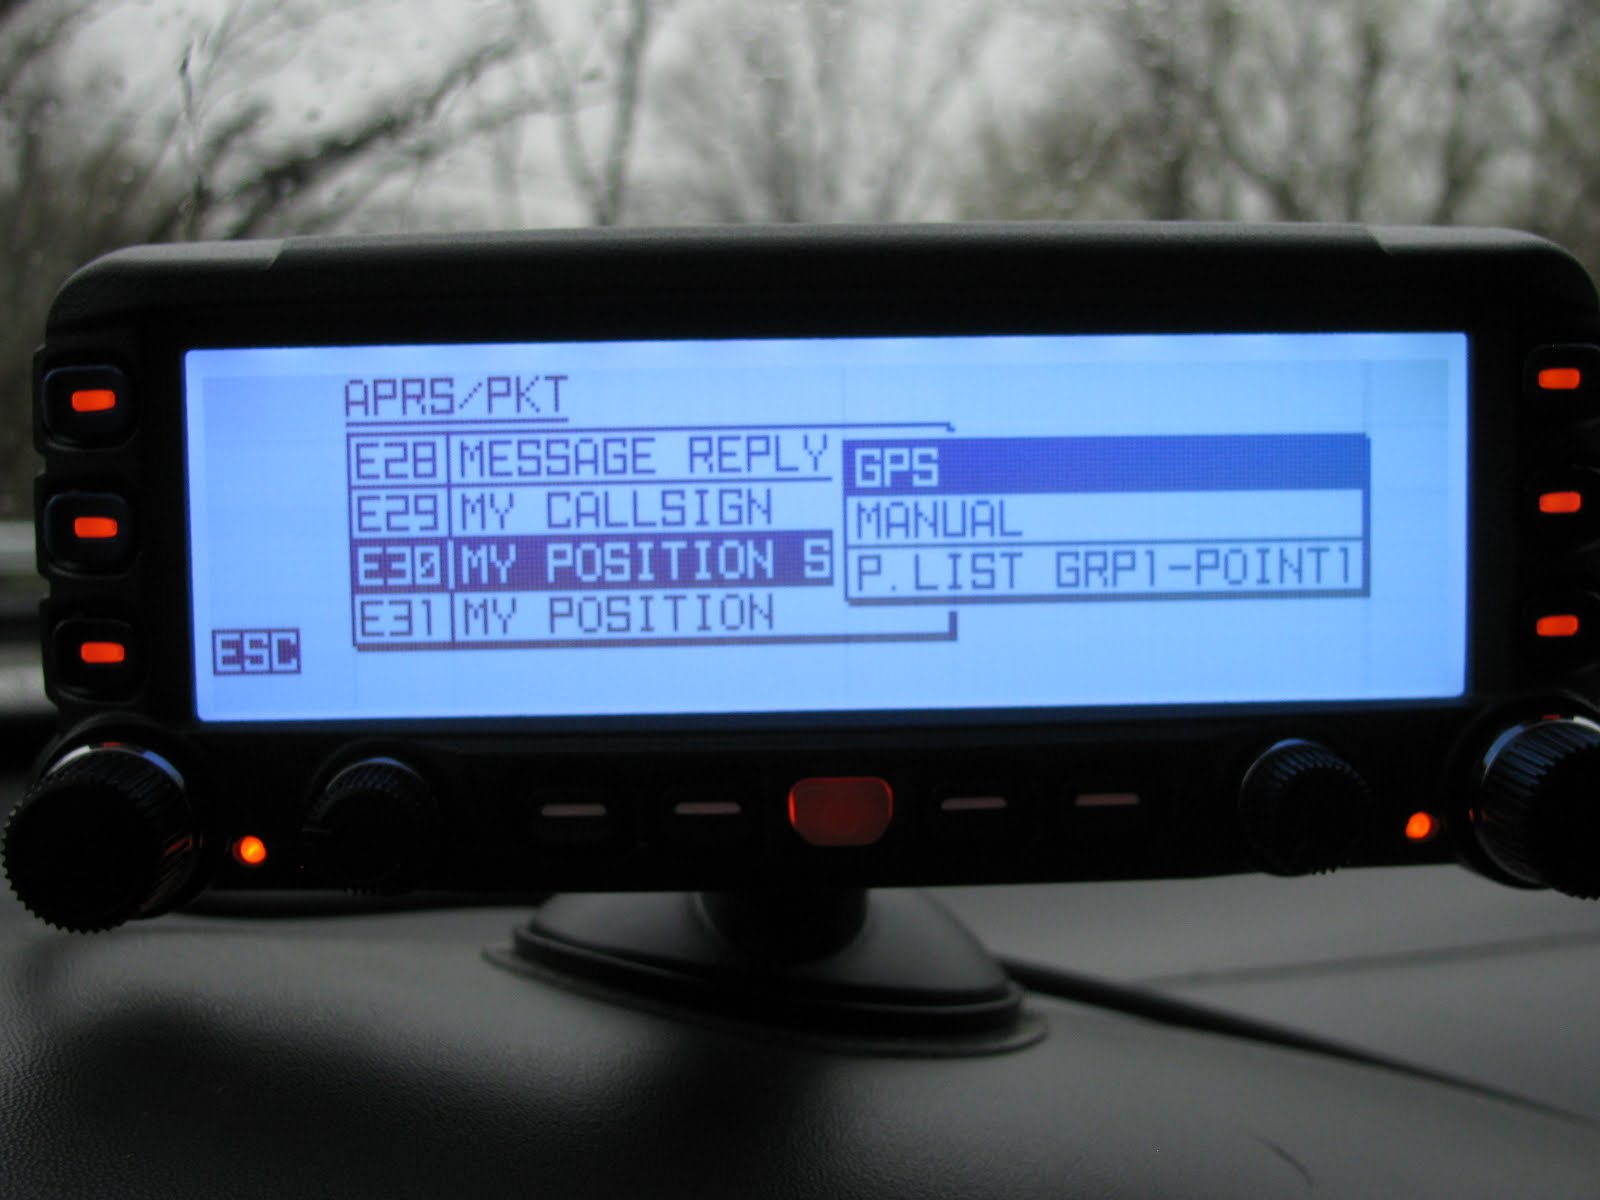
#3: E30
Make sure the position set "GPS" is highlighted. This will pull all of your location/speed info from the FGPS-1.
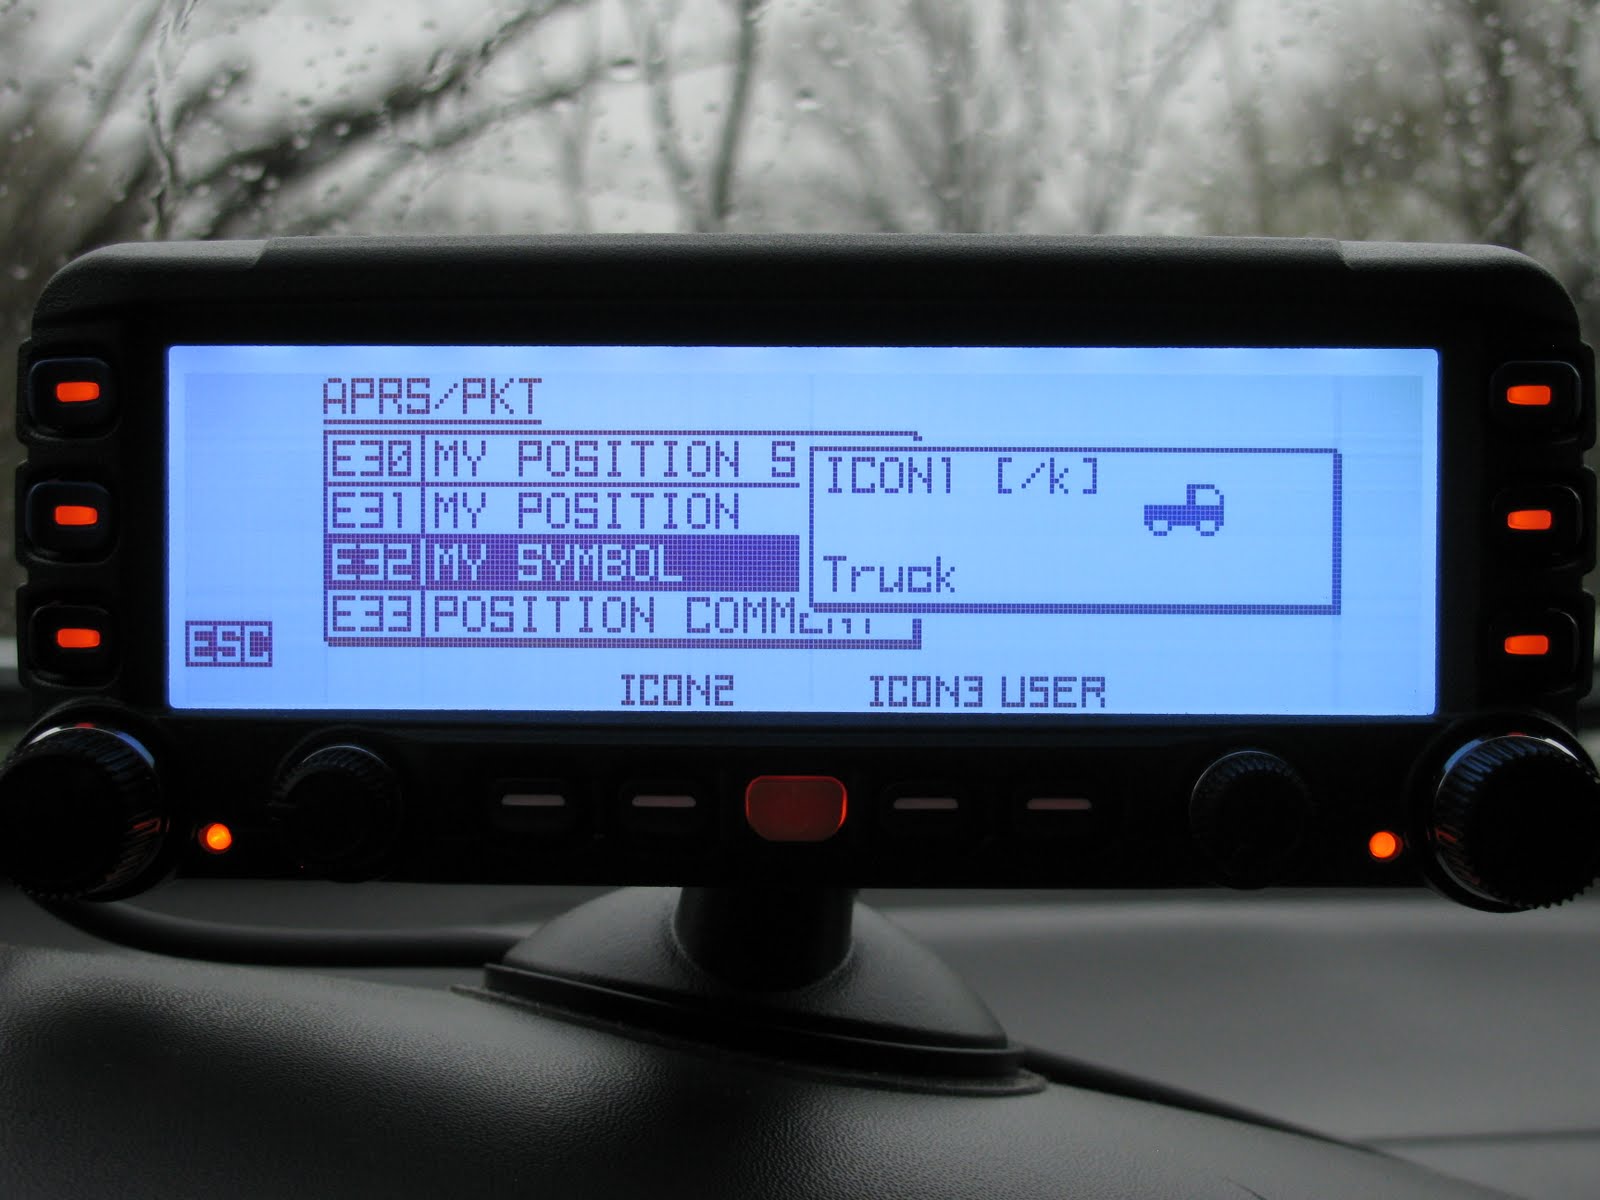
#4: E32
Select your station icon.
#5: E33
Select you position comment (En Route, Committed, EMERGENCY). "In Sevice" is a standard comment for driving around town. DO NOT select EMERGENCY unless you are in a true life-threatening emergency!
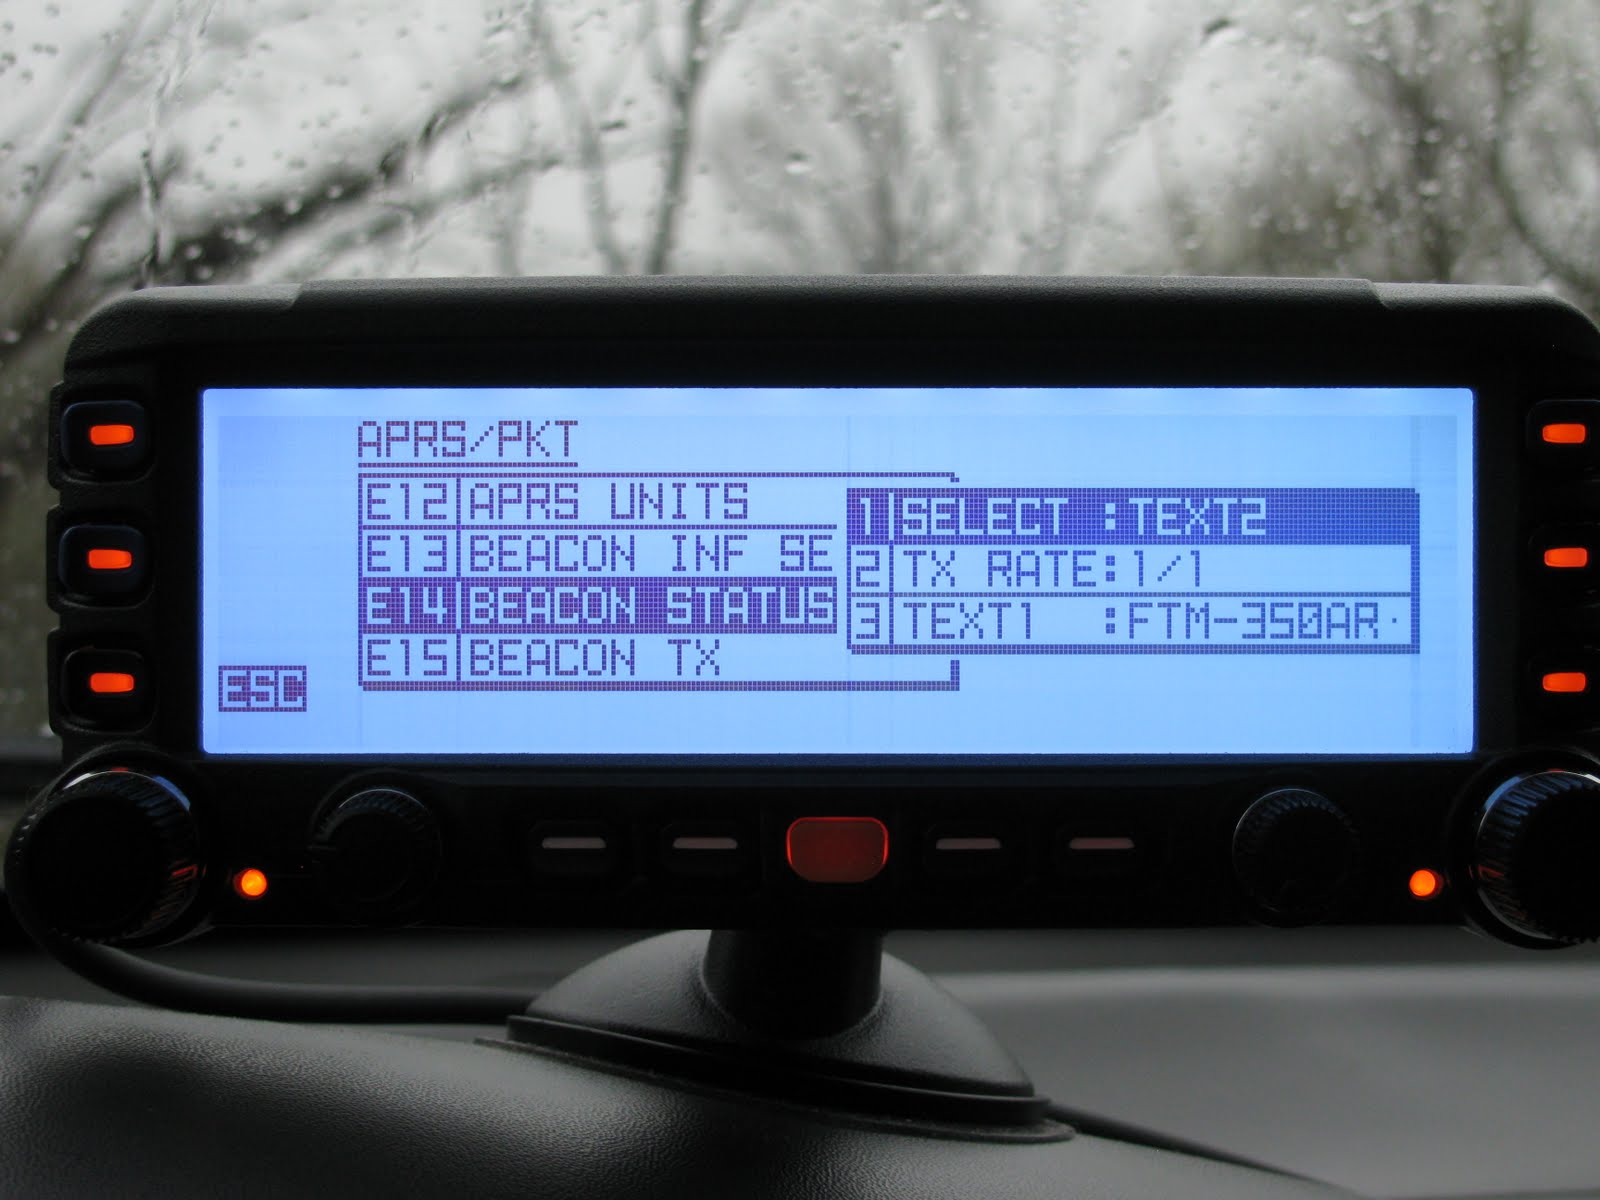
#6: E14
Select your status text (eg: "Hello from Zack," "Driving Again," "En Route to Pizza Party," etc.). This will show up on other APRS user's screens along with you beacon comment, speed, etc. You can program up to five preset texts, then you can select which text to display using menu #1 (highlighted). You can also select the TX Rate (#2). This enables you to program the radio to transmit you status text 1/1-1/8 (one out of one-one out of eight) times the radio beacons.
#7: E15
In this menu item, you select how often you want the radio to beacon (interval), enable/disable proportional and/or APRS decay feature. If you plan on using the SmartBeaconing feature of this radio (which I would HIGHLYrecommend - see next step), you will not need to worry about this step - just leave defaults.
#8: E34
For those of you that do not know what SmartBeaconing is, please check out this link:
In short, SmartBeaconing increases/decreases your TX rate based upon speed, along with beaconing at turns, etc. Please do check out the above website first.
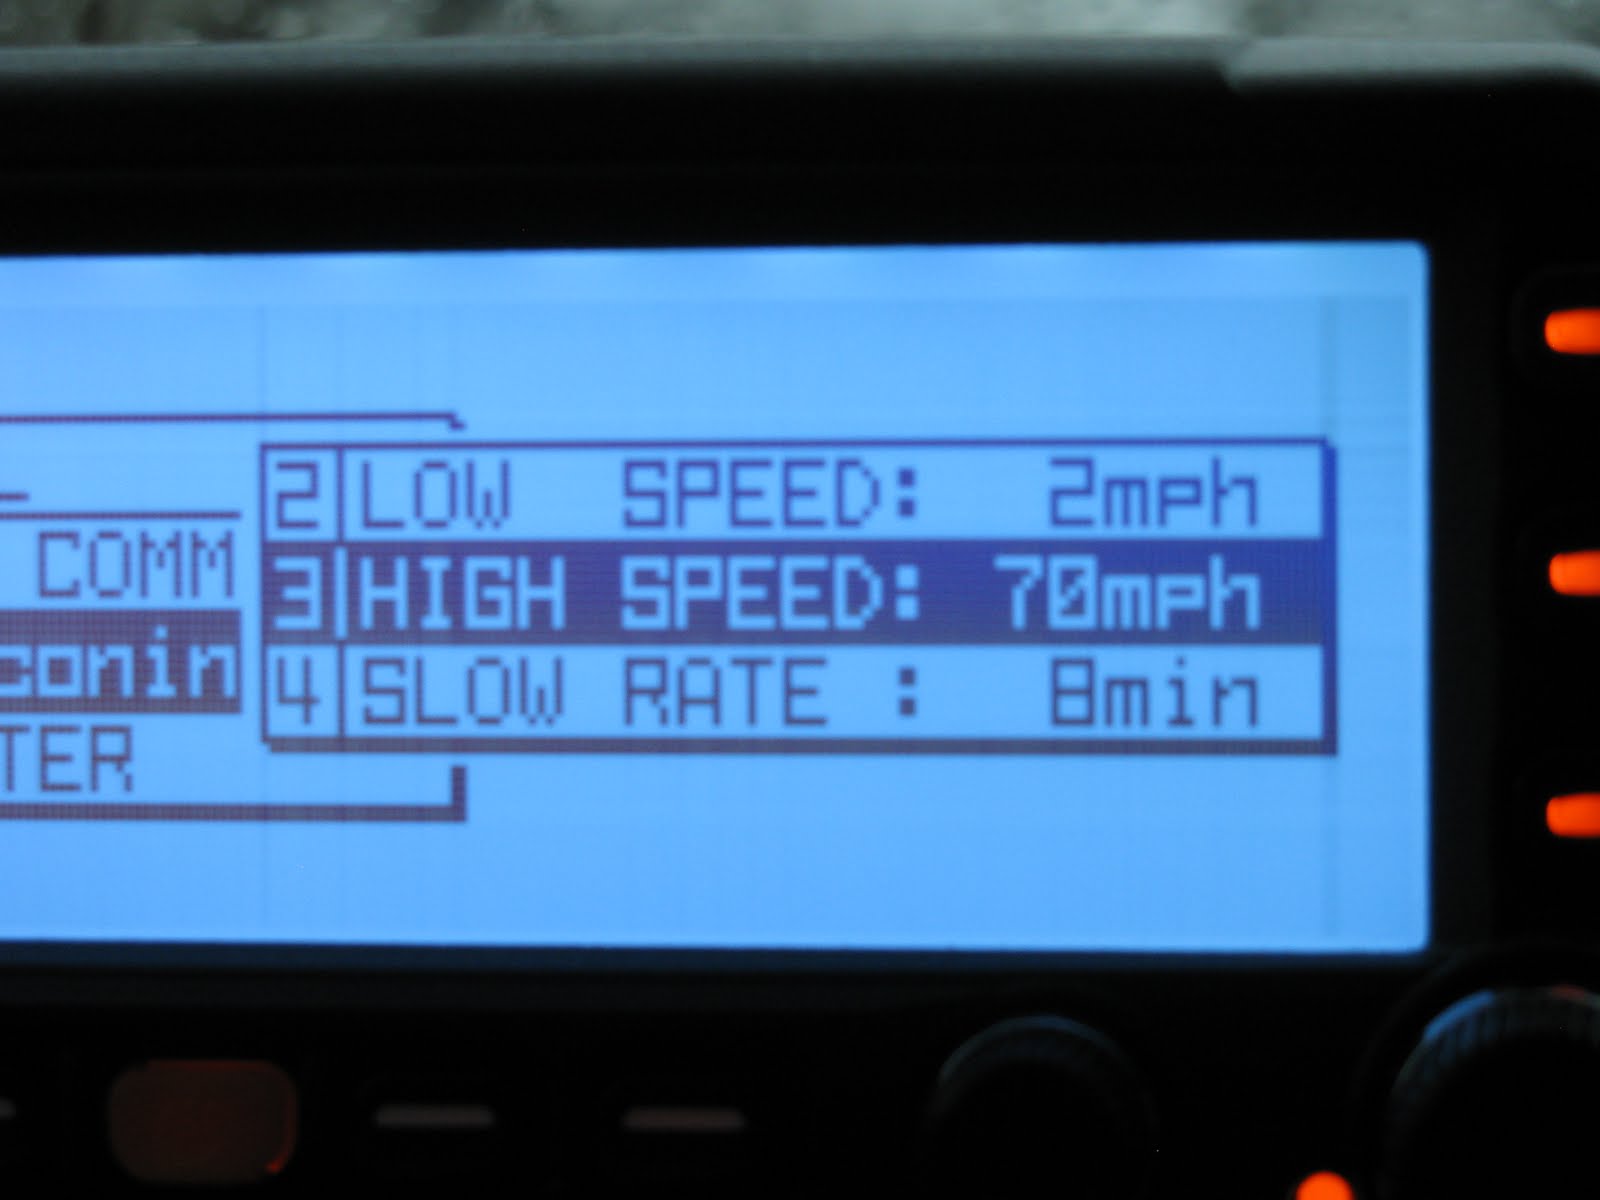
Here are my settings, and they seem to work really well:
Status Type (you can program in separate driving conditions/speeds if you like, otherwise leave it at TYPE 1): TYPE 1
Low Speed: 5mph
UPDATE 8/25/11: I have upped my Low speed to 5mph. 2mph causes too much wandering.
High Speed: 70mph
Slow Rate: 8min (this is the rate at which the radio will beacon if you mph is at or below your low speed setting)
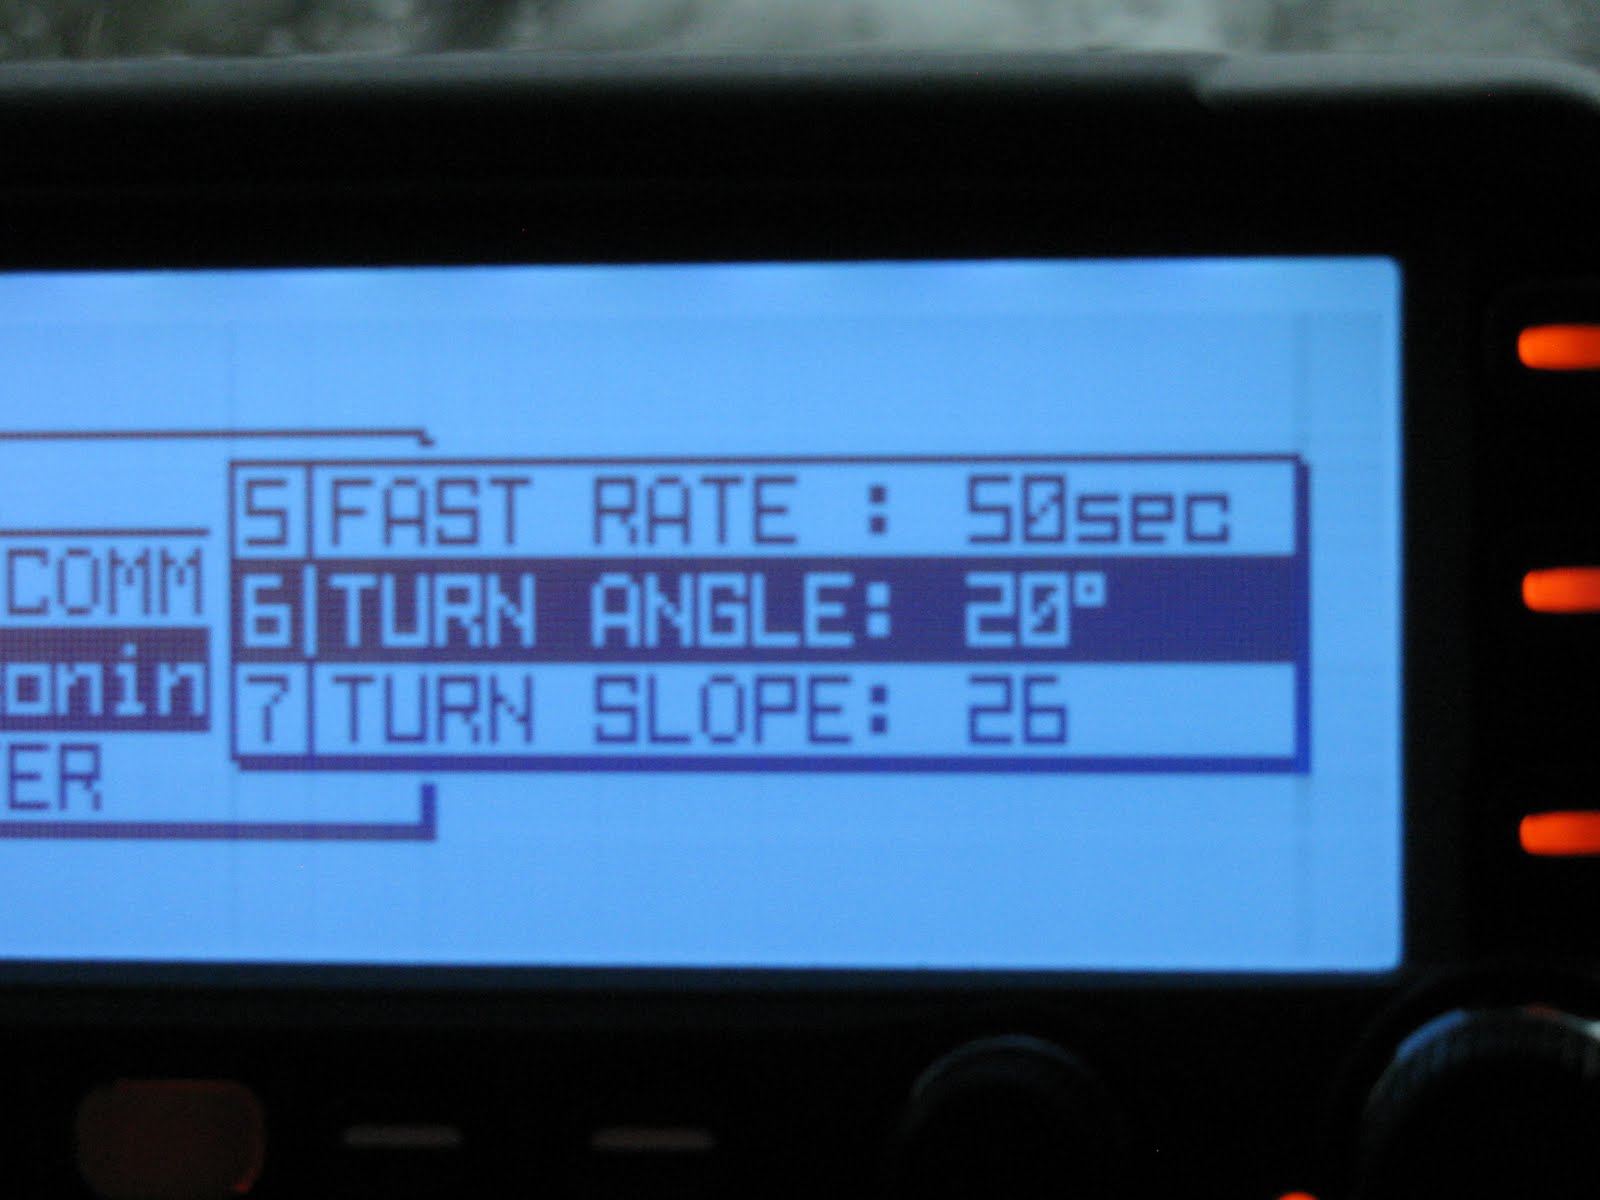
Fast Rate: 50sec (this is the rate at which the radio will beacon if your mph are at or above your high speed setting)
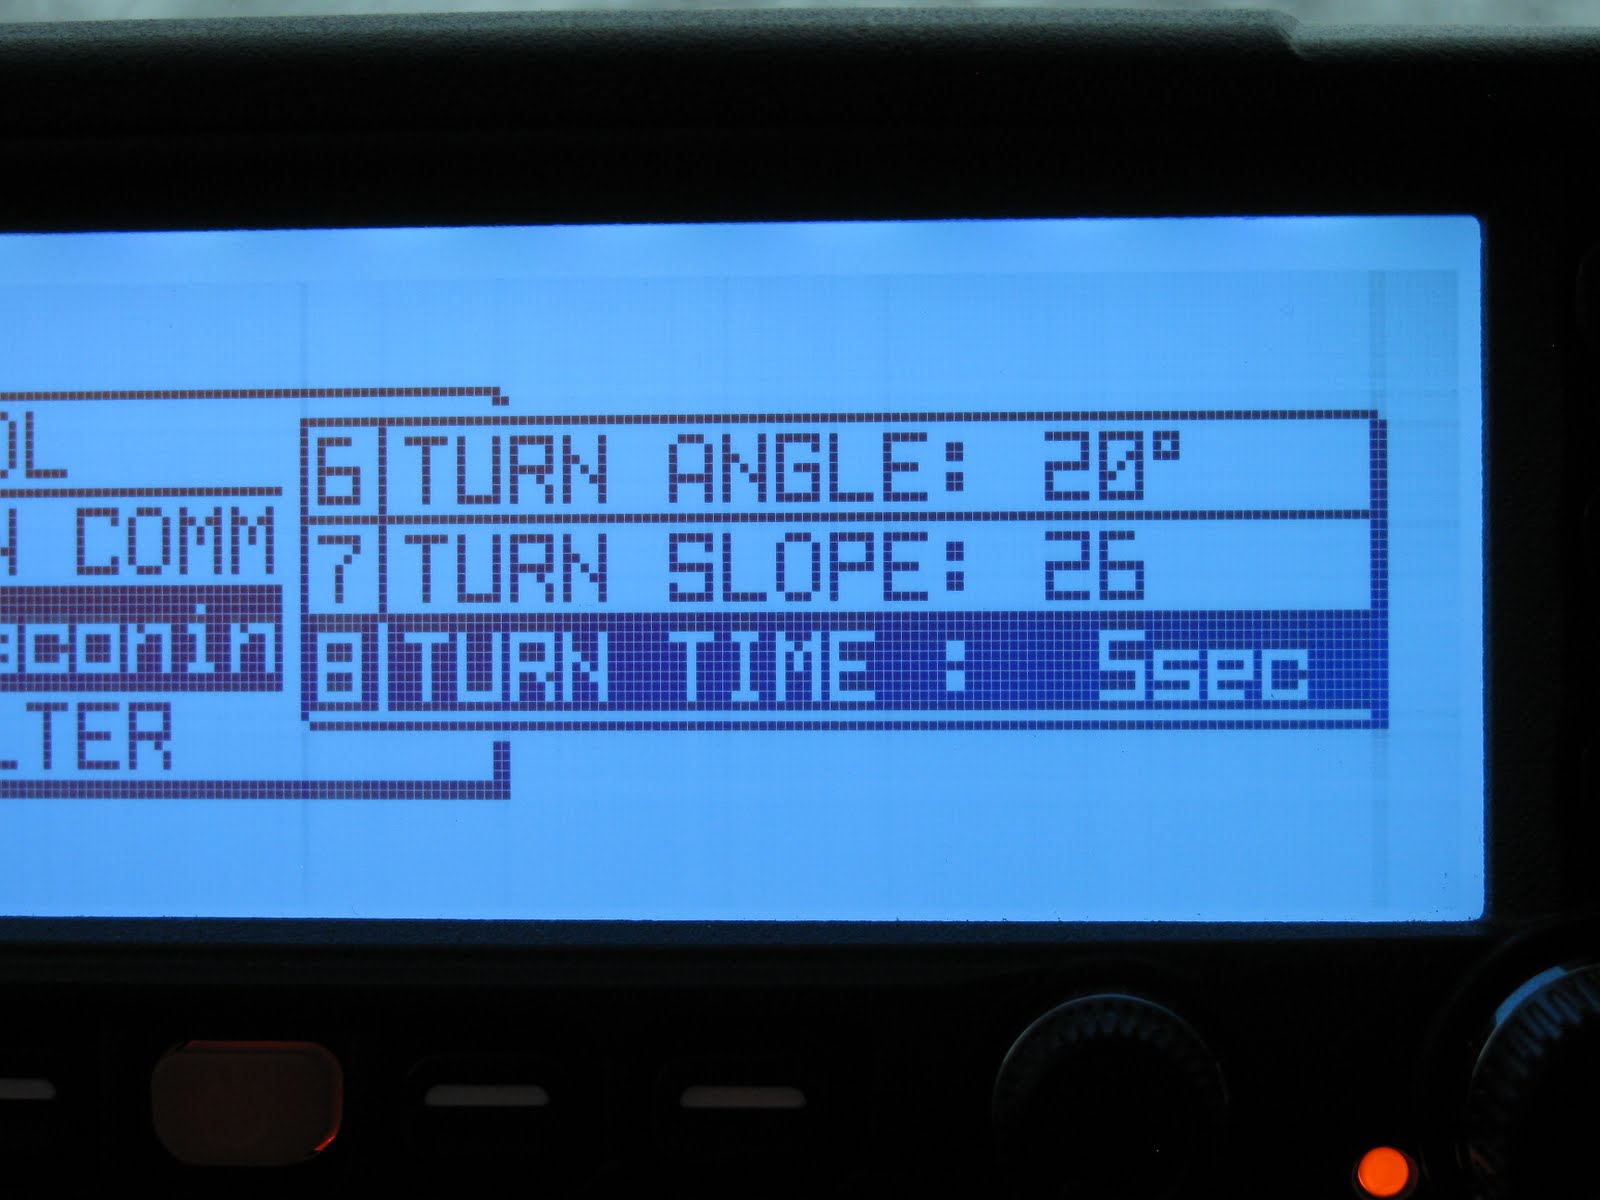
Turn Angle: 20 degrees (degree criteria at which the radio will beacon (ie. a turn))
Turn Slope: 26 degrees (still trying to figure out this one)
Turn Time: 8sec (prevents your radio from going into a TX loop if you are driving in a circle in a parking lot)
UPDATE 8/25/11: I have changed my turn time to 8sec, but 10 is also a good rule. 5sec is too fast.
See all 4 pics:
#9: E20
Next you need to select your digi path. WIDE1-1 and WIDE1-1,WIDE2-1 (recommended) are preprogrammed into the radio, but you can also program up to four different paths (eg: ARISS) via menus E21-E24. You can then go to menu E20 and select digi path 1, 2, 3, 4, whichever one you used.
#10: E18
Ensure that your APRS data speed is set to 1200bps.
#11: E17
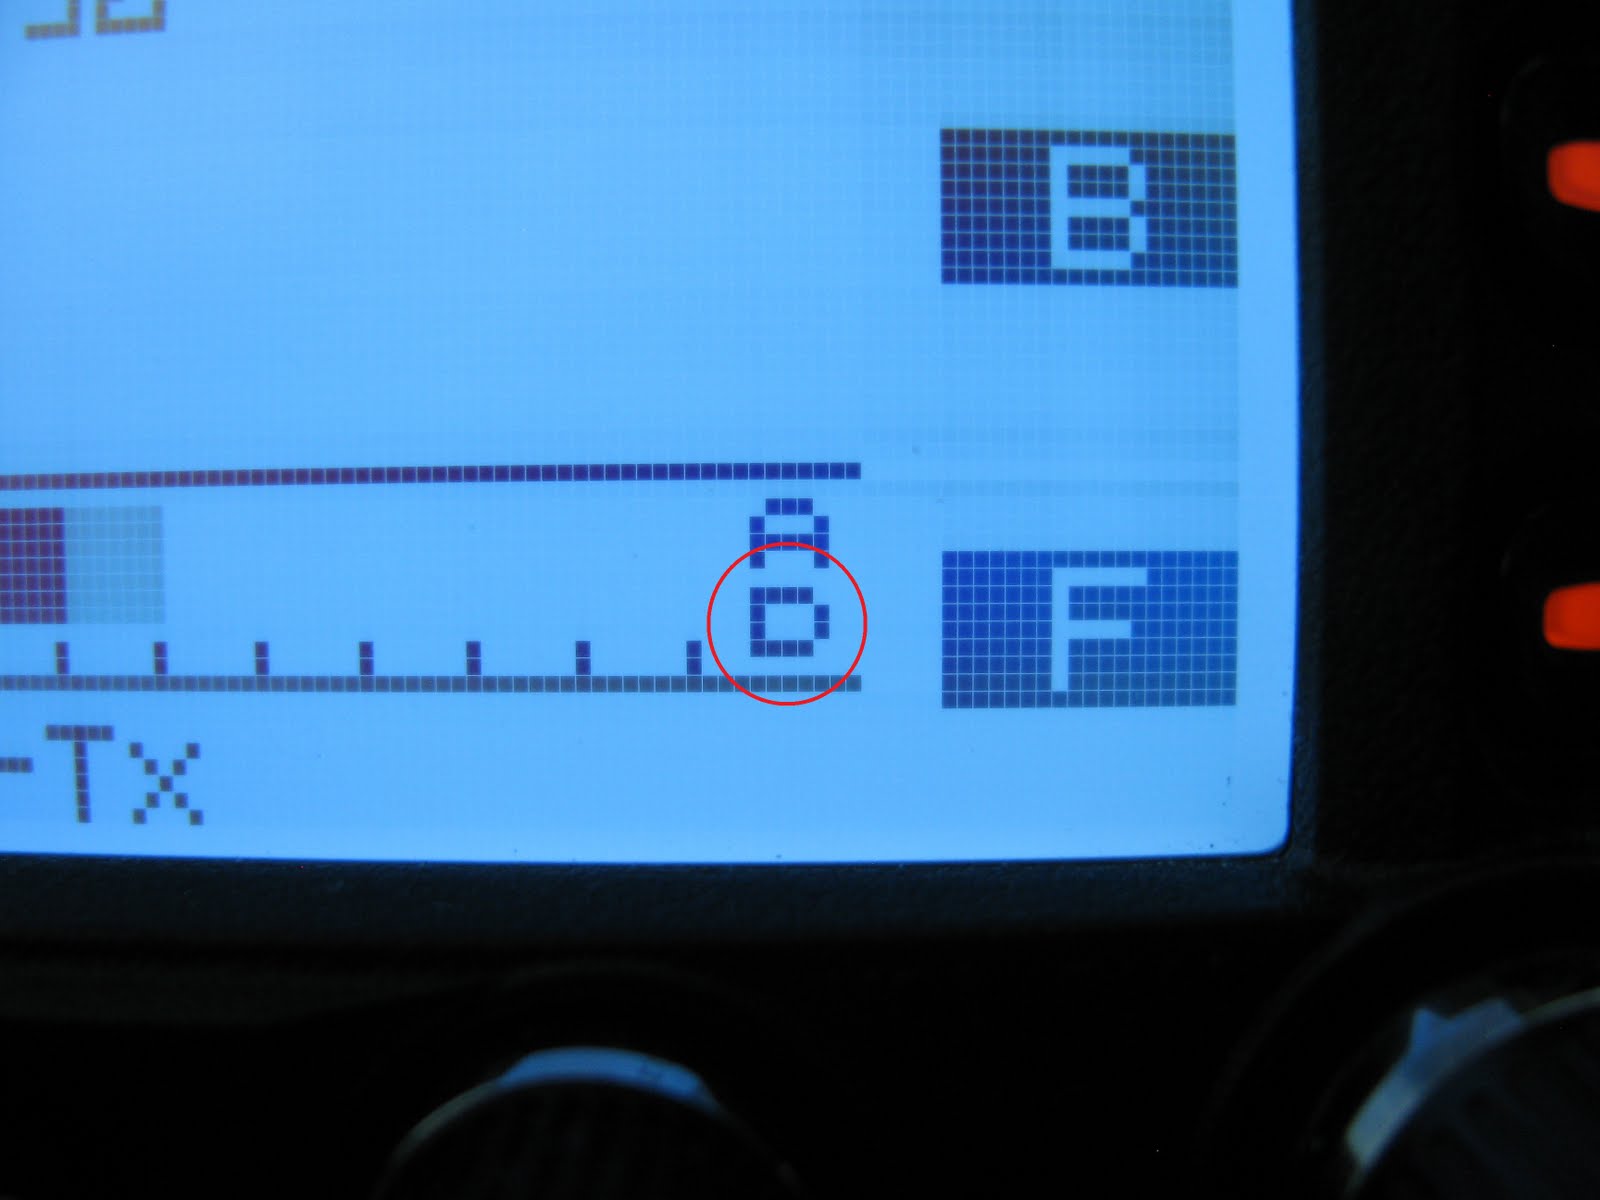
APRS band select. This determines which band (left or right) you want to use as your APRS band. You can see in the picture that I have mine set at APRS: R-BAND FIX. You will see a "D" icon appear in the lower corner (near S-meter) of whichever band you select. See second pic.
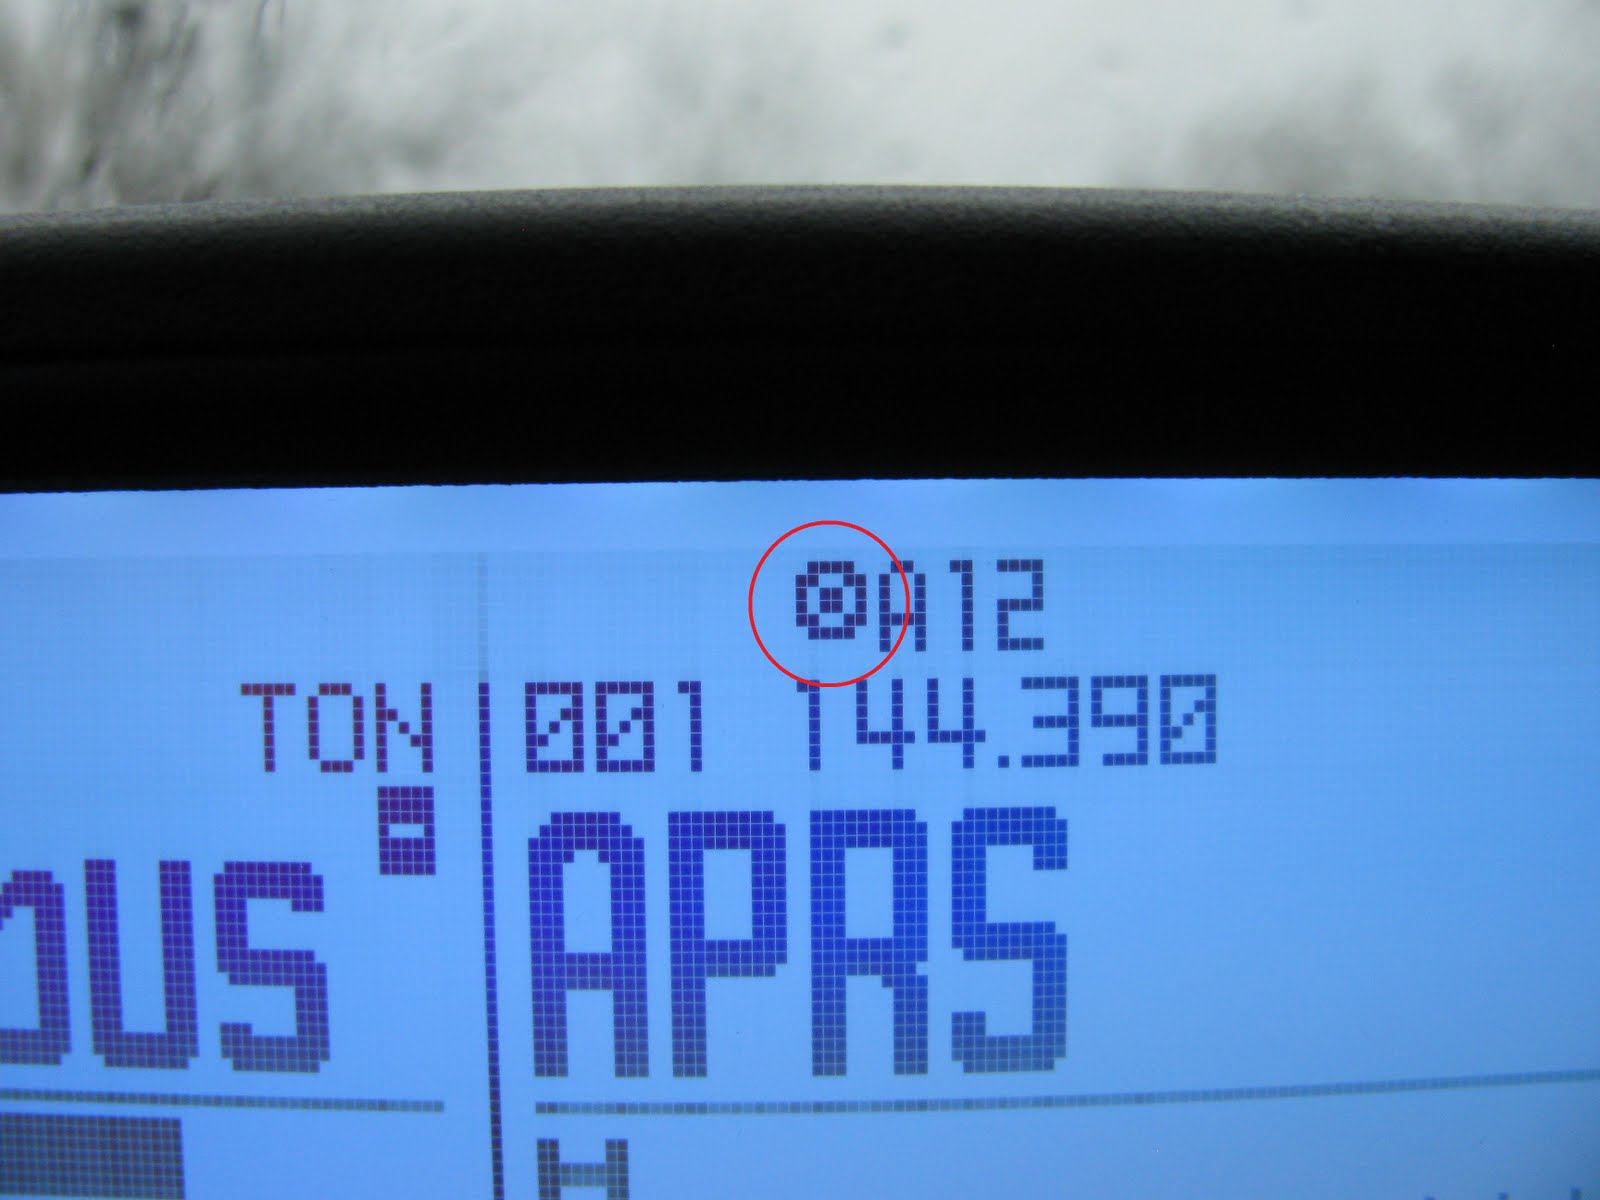
#12: E05
Turn the APRS modem "ON." You will see a "A12" icon (see second pic) appear in the upper right hand corner of the main radio display. Note that in order to use the crossband repeat feature you will need to turn the modem "OFF." This will not erase your settings.
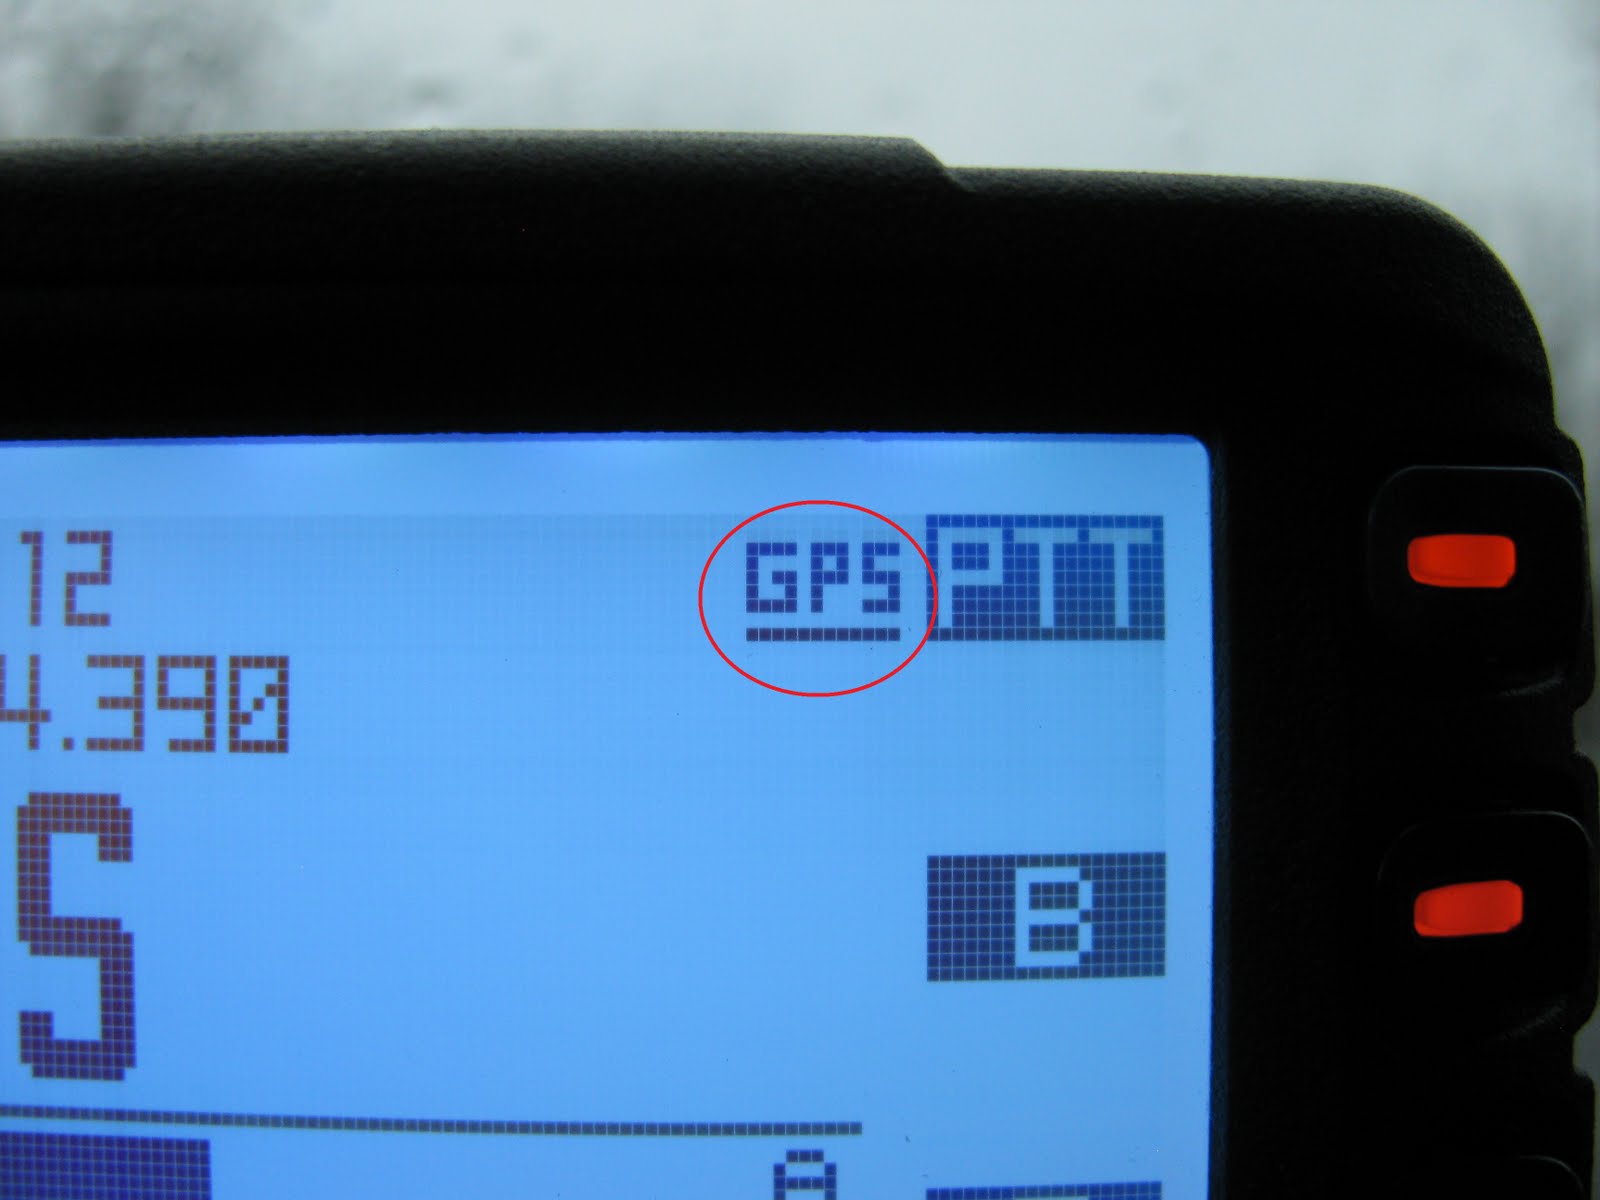
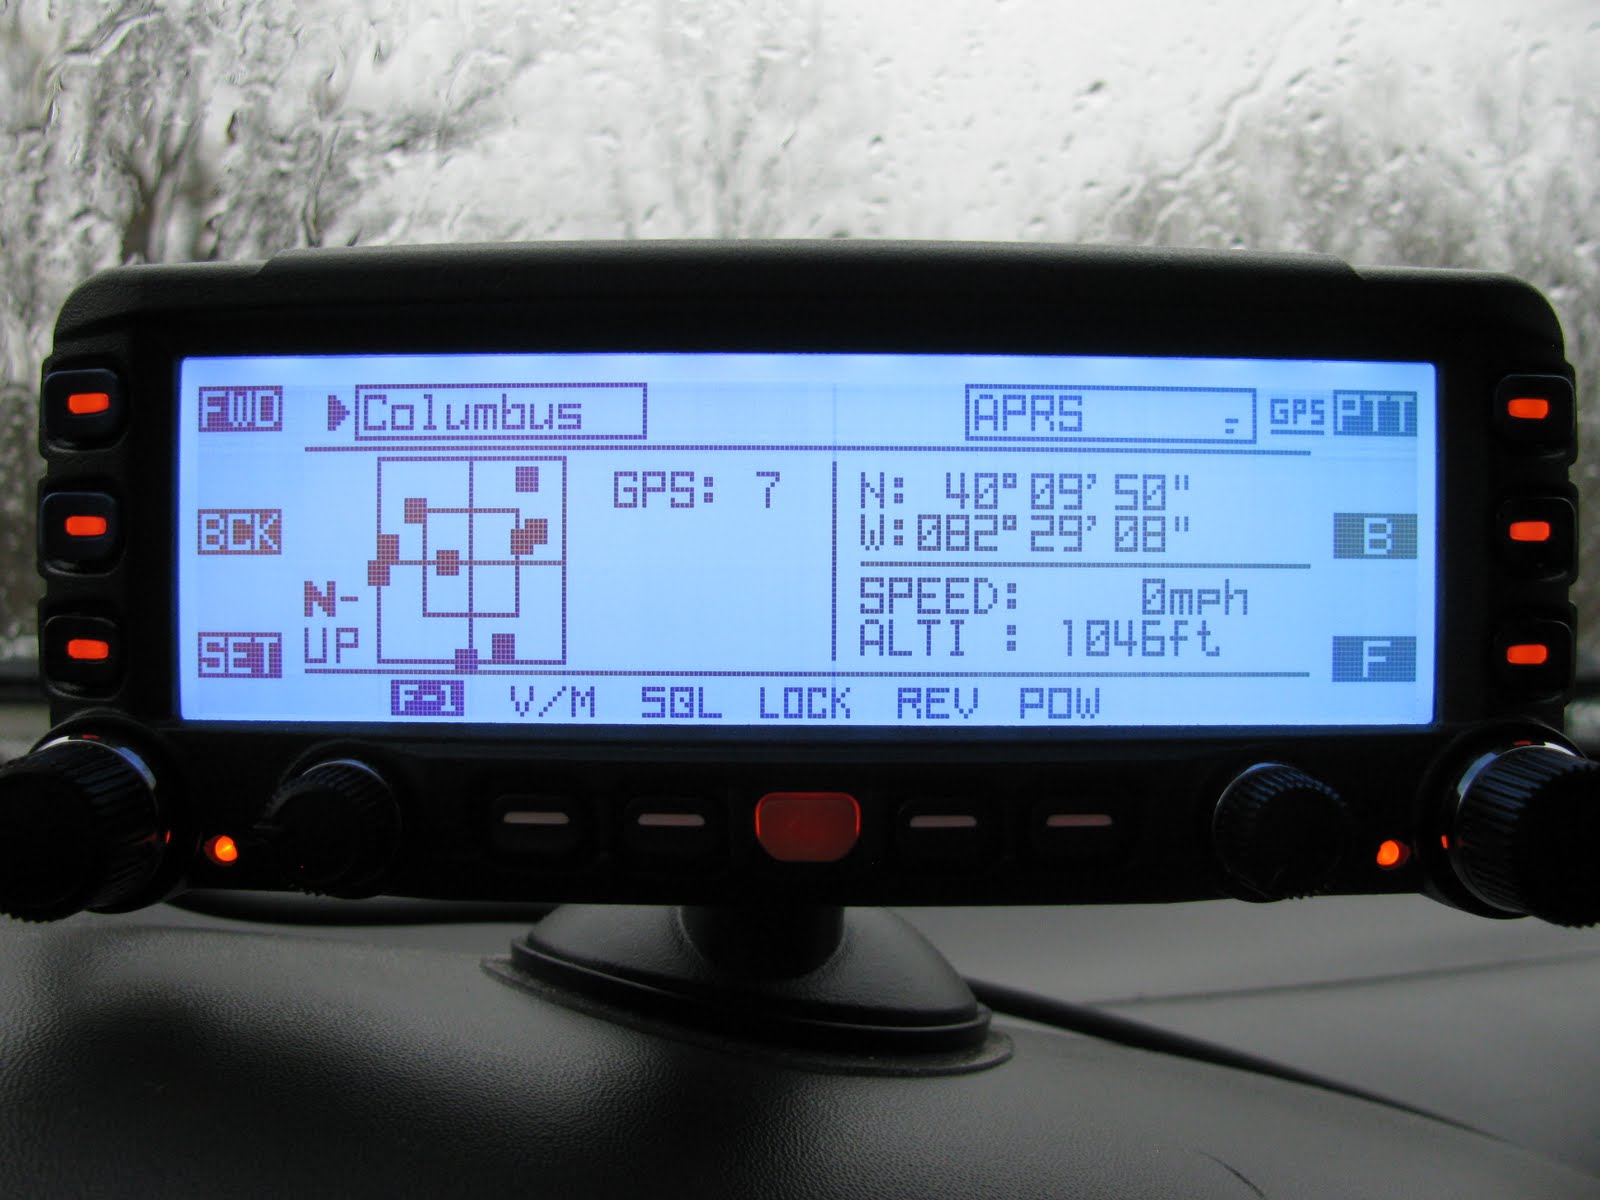
#13: GPS Display
In order for the radio to transmit a beacon, the GPS module must be locked onto at least 3 GPS satellites. If you try to force a beacon via the "B-TX" button, a "TX ERROR" message will appear. Once the module has acquired 3 sats, a "GPS" icon will be displayed as shown below. Another way to check is to use the "BCK/FWD" buttons on the radio until you reach the GPS satellite page. By default this page is not enabled. To enable go to SET > DISPLAY > CO1 > #4GPS > ON. See third pic.
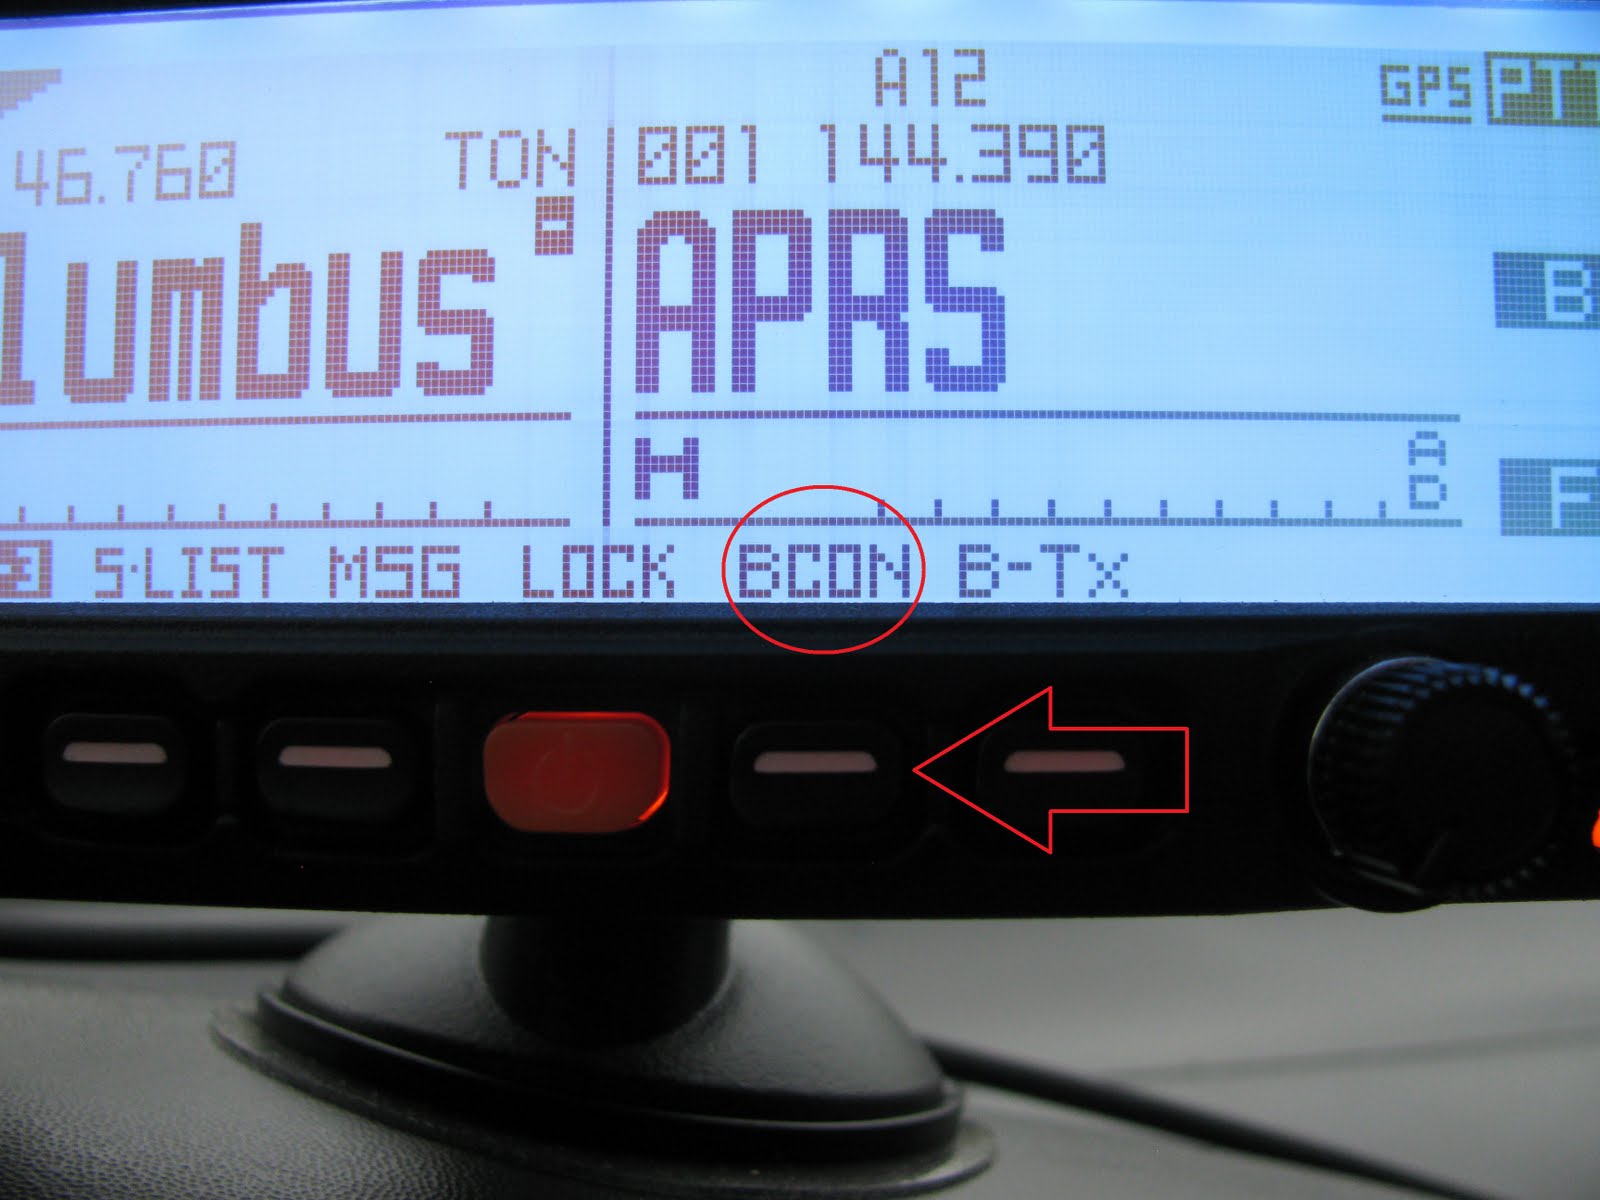
#14: BCON (Beacon)
Assuming you have followed all of the above steps and have your antenna hooked up, it is time to test it! You can make the radio beacon three different ways:
#1: Force Beacon - press the "B-TX" button next to the "BCON" button on the main display. This would only be used if you wanted to transmit one beacon, so I am not including a picture for this step.
#2: "Standard" Beaconing - press the "BCON" button one time until the circle with the bull's-eye appears next to the "A12" in the upper right-hand corner of the display. See pic.
#3: SmartBeaconing (I would recommend this one) - press the "BCON" button described above two times until the circle without a bull's-eye appears next to the "A12." Bull's-eye = standard beaconing, no bull's-eye is SmartBeaconing.
Note: Whichever method (standard or Smart) beaconing you use, there is no need to go into the menu and program in your setting each time you turn the beacon on. If you want to use the standard beacon, program your settings into menu # E15 (step #7 above), and select the "BCON" button. The radio will automatically use your settings each time. You turn the beaconing on/off with the "BCON" button.
If you decide to use SmartBeaconing, program your settings in menu # E34 (step #8 above), and select the "BCON" button twice until the circle without the bull's-eye appears. Turn the beacon on/off via this button as well.
#15: Did It Work??
In order to see if your radio is beaconing properly, go to www.aprs.fi and punch in your SSID (KD8KSN-9) and see what the search brings up!


 發表於 2011-9-19 23:30:11


 收藏
收藏 分享
分享 頂
頂 踩
踩